Saturday, May 28, 2011

Field Day

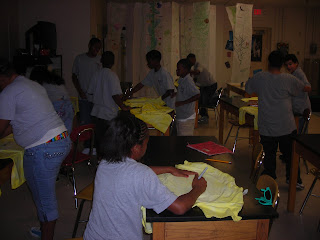
On Tuesday, we had field day and awards day for the end of school!  It was a super special day and I have some great pictures to share... Don't those tie-die shirts look good?
Decorating Shirts! Go Yellow Dragons!

And then we went to awards!
The Auditorium does not lend itself to high quality pictures!
No pictures of the awards, I was handing them out!  But, these are our African Drummers at school who came to serenade the sixth graders.  They were in awe and I know my kids cannot wait to be 7th and 8th grade drummers!
Then... FIELD DAY!
The whole gang!

Egg-on-a-spoon!

Egg-on-a-spoon Relay

Put on those pants!

Clothes Relay!

Longest Hula Hooper

Wheelbarrow Race aka Push your friends face into the grass relay

Wheelbarrow Quitters

100 Yard Dash - with the Eastern State champion runner

My Team!  Go Yellow Dragons!


Over-Under Sponge Relay and the event directly before I got a bucket of water on my head!

It was a wonderful experience and the kids loved it!  Their behavior was spectacularly good and they had a great time!  Definitely want to do it again next year!

Friday, May 27, 2011

Caterpillar Card

Last summer, I talked my mom into creating a handful of cards.  We whirled into one of my favorite stores and picked up some awesome supplies... she got a handful of these pre-made pieces and I made a few cards.
Little dark... sorry, cell phone camera picture!

Then, I promptly forgot about them....
Until Mom called about a compliment she got on one and I figured, in my crazy, over-self-estimating way, "I can do that again without the card - no problem!"  And off I went, to make another one.  I used Baker's Twine, hot glue, and my Cricket... okay and a few ribbons and a red ink pad with some left over paper from my "stash."

I am making a few for different things, but I just got one finished last night for an assistant principal at my school who is leaving for a new job at a local middle school!  I will miss her... and perhaps one day call on her for a new job, with less crazy kids!

Anyways, without further ado, the card... what do you think?


A close up of the text
So, my caterpillar might be my crafting pride and joy for creative thoughts.... he is a thick line of hot glue squeezed onto wax paper and allowed to cool... Then I pulled it off and wrapped him in Baker's twine!  I think it gives a unique look.... I did try to make feet and antennae, but they looked like deedlyboppers (those headbands with trinkets on springs) and a bad broom.  But I think it is clear enough it is a caterpillar!
Anyways, I have about 5 more half-finished upstairs.  Perhaps I should get started on those!

And PS - School is out for summer!  Watch out for CRAFT PRODUCTIVITY!

This weekend, I am linking up to the Tatertots and Jello weekend wrapup and the CRAFT blog!  Check out these wonderful blogs to gather some great ideas!
Monday, May 23, 2011

I LOVE my Job!

And you can tell because I spent my weekend making projects for my kids!  That's right... tie-die-ing (sp?) and making bean bags all for FIELD DAY!  It might be really fun or it might be eternally miserable.  I'll report back tomorrow!
Until then, these pictures will have to do! This is an abbreviated picture tutorial on how to tie-die a t-shirt a single color!

STEP 1: Put rubber bands on t-shirts in any pattern you want.  I did 17 shirts... in total, we did 65ish shirts as a group!
STEP 2: Put die into a large bucket - if you are not dying in the washing machine.  This is a kitty litter bucket!
STEP 2 - PART 2: Stir well.  May I recommend a garden stake.
STEP 3: Dump in your t-shirts.  A morsel of experienced wisdom.  I put in all of my dye and half of my t-shirts.  The second half came out much lighter than the first half.  I might recommend dumping them all in at first for the initial coloring and then giving each an additional fifteen minutes (ish) of soaking time.  Stir t-shirts, allowing each to be colored completely.  Use gloves to prevent hand coloration.  Use well-fitting gloves to prevent all coloration.  I had about a gallon of water in my glove when I was finished... and yellow fingernails.  
STEP 4: Shoot the breeze with your co-workers while the t-shirts soak.

STEP 5: Remove the shirts and lay out to dry... I do not have any pictures, because at this exact moment in time, our 95* sunny day began to be overcast and rainy.  So, I will post pictures of the finished shirts tomorrow... hopefully on children!  They turned out super awesome!

I'll be happy to answer any questions about my meager tie-dying experience!

My second weekend craft was these sweet bean bags for the beanbag toss!

I think they turned out really cute - especially with this polka-dotted fabric from the Hobby Lobby!